Hi Students of the Data Analysis Course,
For this course we will use QuPath 0.4.0
We will use a preinstalled version of QuPath bit if you want you can install it yourself.
A good start for getting to know QuPath is looking at the video tutorials #1: https://www.youtube.com/c/qupath
Install QuPath and download Examples
https://qupath.github.io
On Windows run the downloaded MSI file, it will complain about not being verified, just allow it to install.
(Alternatively download the zip file, see: https://github.com/qupath/qupath/releases/tag/v0.4.0)
On a MAC you have to hold down the left SHIFT key and click the install package and allow it to install.
When done installing QuPath you can download some of course data and scripts here: QP-ML-Course.zip
Unzip this file and find the “project.qpproj” file in the “ML-DL-Data-Examples/QPP” folder. Drag it into the main QuPath window to open de project.
It will sometimes show a dialog while loading the project, because it cannot locate the data files (images). It suggest most of the time correctly where the data files are (in the ML-DL-Data folder).
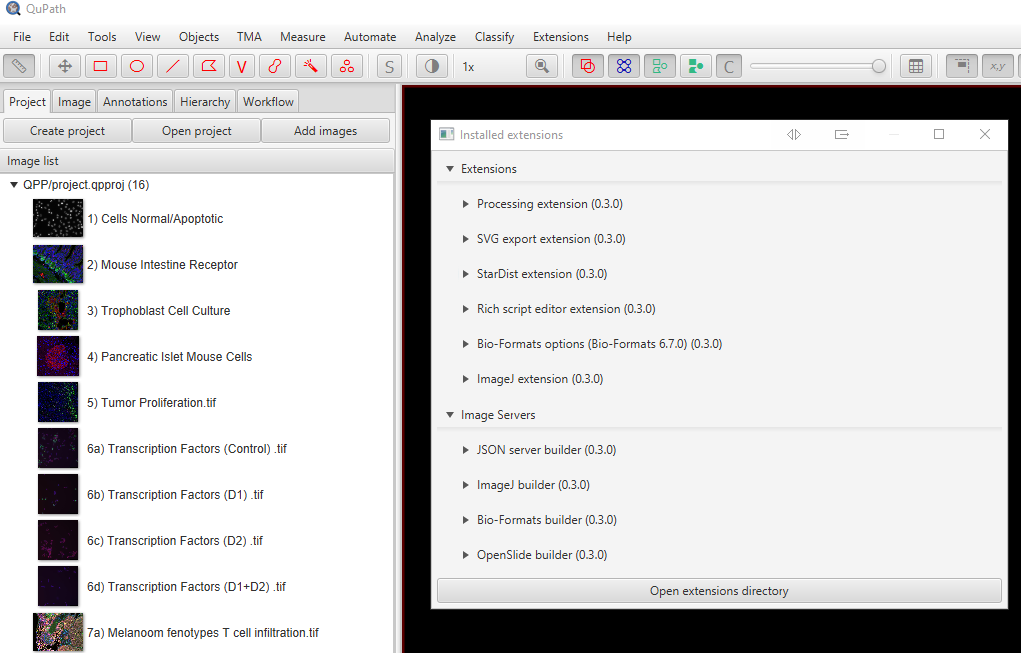
If everything is correct, you see the data files (images) on the left.

Install Stardist
- Stardist: https://arxiv.org/abs/1806.03535
You also have to install the Stardist extension. (https://github.com/qupath/qupath-extension-stardist)
To install the StarDist extension, download the latest qupath-extension-stardist-0.3.2.jar file from releases and drag it onto the main QuPath window.
When selecting the “Installed extensions” menu item in the “Extensions” Menu, you should see “StarDist extension (0.3.x) “.
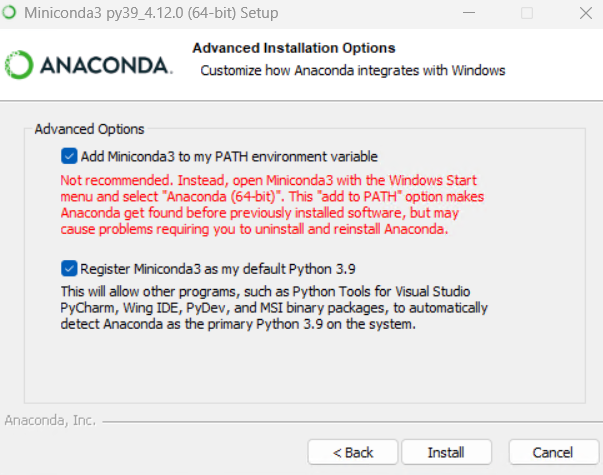
- Download Miniconda, install and it, be sure to check both checkboxes when running set-up)
https://docs.conda.io/en/latest/miniconda.html
- On the user command-line (run cmd.exe) run these commands in this order!:
-
conda create --name cellpose
-
conda activate cellpose
-
- Follow the instructions on the Cellpose Github Site.
- Install the QuPath Cellpose Extension (like the Stardist Extension)
https://github.com/BIOP/qupath-extension-cellpose/releases - Do not forget to set the settings of this plugin to Conda Env: cellpose and cellpose
- Cellpose is very slow without a GPU. If you have a Nvidea GPU and run Windows or Linux folow the instruction op de Cellpose site to install GPU support.
Here a video of my install on Windows 11. As mentioned above the installation of QuPath can ask more questions because of security settings of your computer. In the video you do not see them. (Also the video show QuPath 3.2)